This is it. The last Hoo-Rah. I am FINISHED.
Here is what I had left to do--
 |
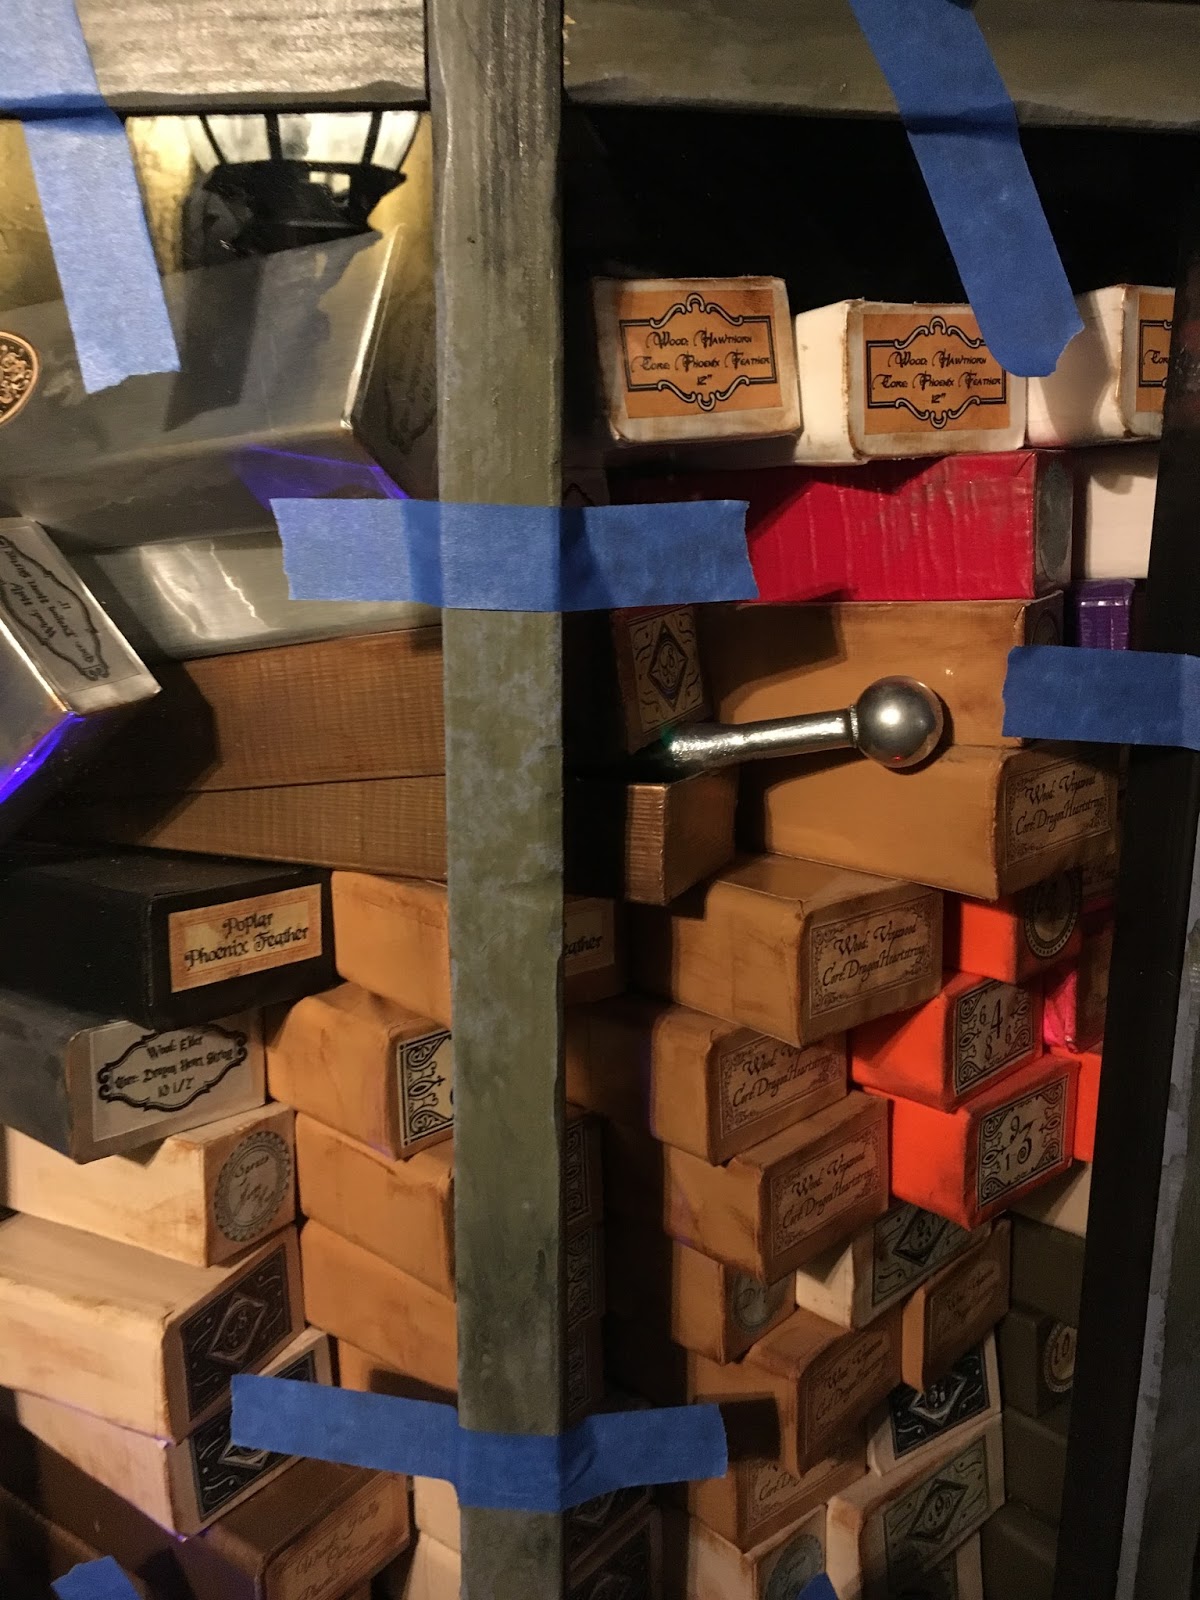
| I spent several weeks making wand boxes. This was the most arduous, pain staking, mind numbing, eye clawing, patience testing thing I have had to. I thought Ollivanders would be a quite simple design. Fill the shop glass with wand boxes. Easy right? Yeah, well 400+ wand boxes didn't come together in one night, or 5 nights, or 2 weeks.... it took the better part of an entire month of nights and weekends to put this shop together. I made it through all 7 Harry Potter books on Audible in the time it took me to finish Ollivanders. This picture show my gradual rising stack of wand boxes. |
 |
| Most of the wand boxes are faux fronts with only the side being full scale boxes. Hopefully when it all comes together you won't be able to tell the faux ones..... |
 |
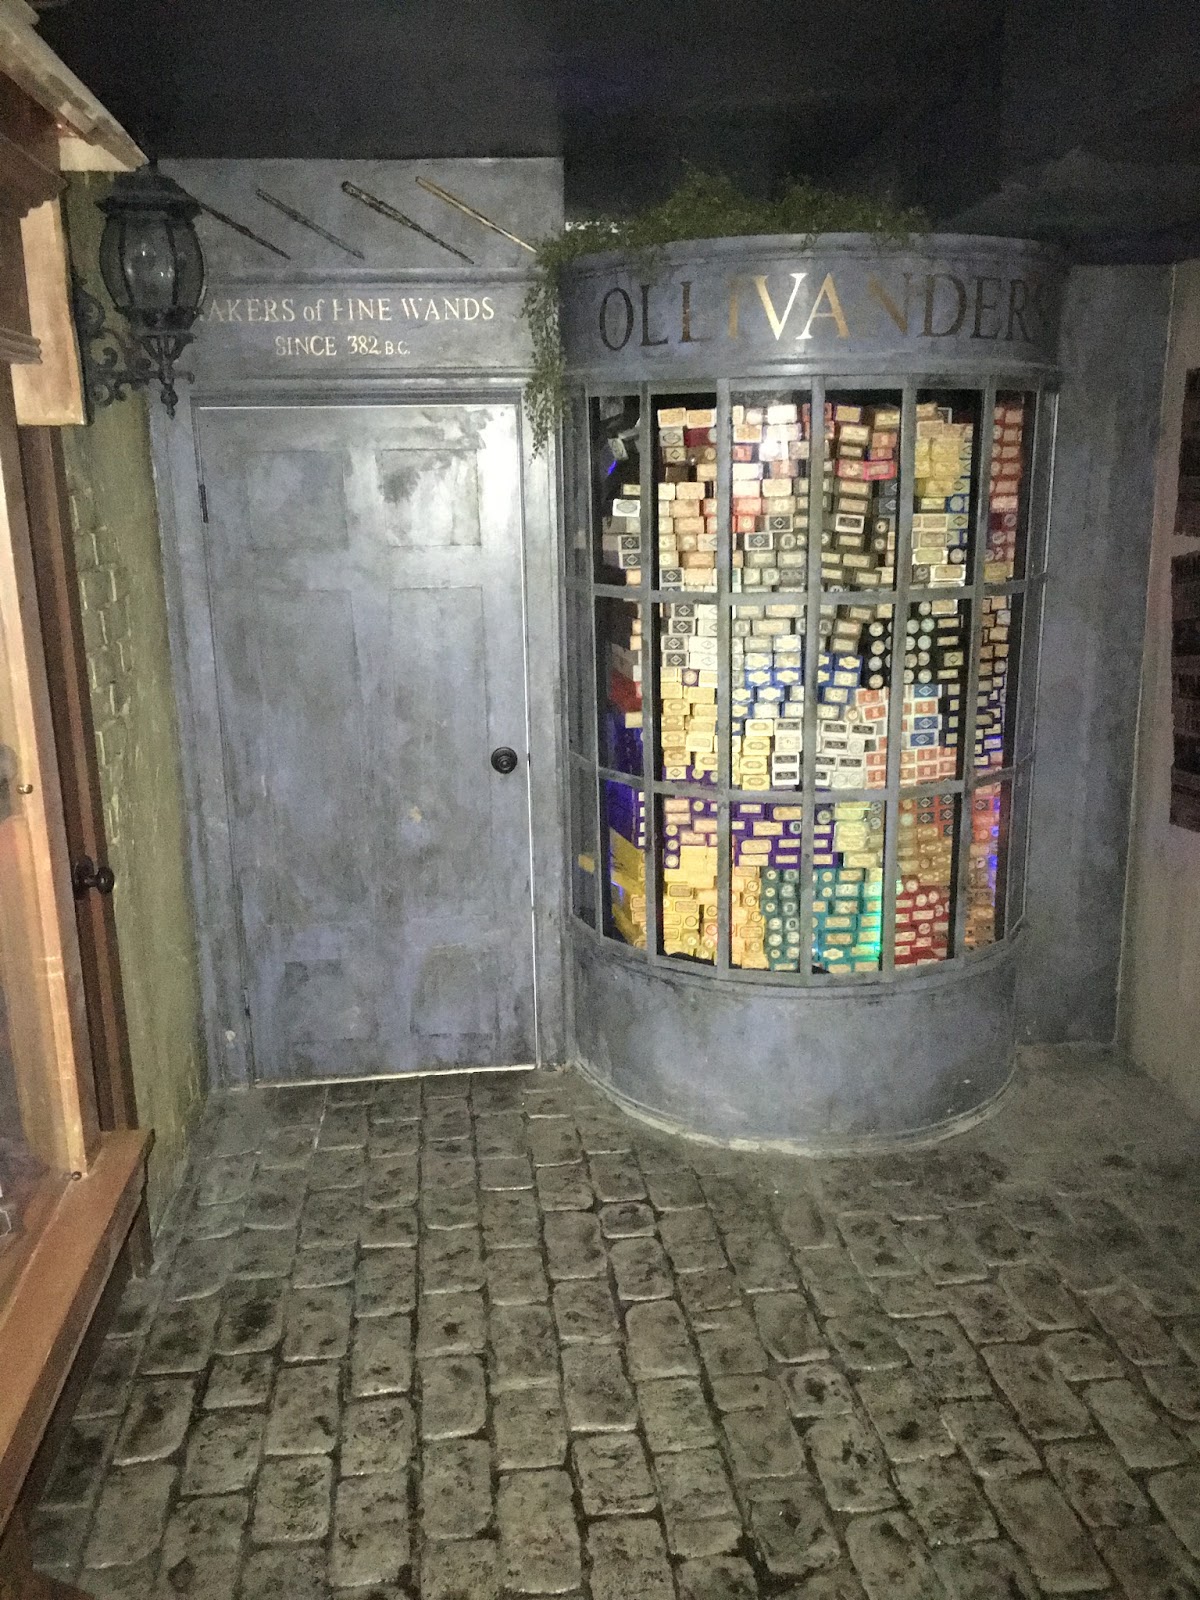
| There is Ollivanders Packed to the hilt. The top ones still need to be wrapped. |
 |
| I added LED lighting at the base. Not sure if I like but I'm leaving it for now. |
 |
| Once all of the boxes were finished I spent several nights designing, printing, cutting, and applying labels. at first I grabbed some pre-done labels from the web but I have so many wand boxes that I ended up making most of the labels myself to ensure a good variety. |
 |
| I start applying labels. |
 |
| Mod Podge was perfect for adhering and protecting the labels. |
 |
| Sooooo many labels! |
 |
| After all the labels were on I went back over all of the boxes and added dirt smudges, dust, and aging effects. |
 |
| Ollivanders is stocked and ready. |
 |
| Close-up pics to show some of the details of the boxes. One box is opened, revealing the end of a wand. |
 |
| More close-ups. showing detail and variety. |
 |
| Last thing I had to do was set the plexi-windows. Somehow I managed to order 1 pane shy.... it would be 2 weeks before the new pane would arrive so I moved on to my checklist of other finish items while I waited. |
 |
Katrina asked for more shelving in her nook. (painted later).
I also added an escape door from Katrina's room to Cecily's so she would have a 2nd exit for safety. |
 |
| Shara asked for more shelves too. I also added fans and more venting for the nooks as they could get kind of stuffy after a while. |
 |
| With more time to spare I decided to add a rat clambering along the roof of Flourish & Blotts. Close examination would revealed a stumped right index finger. Peter Pettigrew perhaps? |
 |
| I added drain clamps to my downspout. A small thing, but it really helped sell the appearance of an actual drain spout. |
 |
| Ever since I finished Slug & Jiggers I felt like Flourish & Blotts needed.... more. so I took the time to redesign it. I added more books, candlesticks etc. |
 |
| I also printed a few fan-made replicas of the Quibbler and added a Hogwarts standard issue parchment quill and ink set for 1st year students. |
 |
| Very happy with this redesign. |
 |
| Last thing for F&B was to make a hanging sign. I decided to try hand painting this one instead of masking and spray painting as I had done on the rest. |
 |
| Finished product came out OK, but not thrilled with it. |
 |
| Hung the sign anyhow... I am perhaps to harsh a critic of my own work. It looks pretty good and definitely adds to the overall feel. |
 |
| My bother cut out a laser etched replica of the leaky cauldron sign seen in the 1st movie which I hung on the hinge side of the door to the Leaky Cauldron (entry/exit of the room). |
 |
| I painted the Leaky Cauldron door but it looked too bland so I decided to add a sign to it. I used a snapshot of the movie version as inspiration for my own. |
 |
| Screwed and glued it. Added old fashioned nail heads made from warblas to cover the screws. Then added water and rust stains to help it blend in. |
 |
| My wife thought it was a shame that I had made this really nice looking wand and was hiding it away inside of a wand box in Ollivanders. She thought some wands should be on display somewhere and I agreed but I couldn't fit any wands inside of the shop window. After playing with several ideas I decided to make a few more wands to show off some of Ollivanders craftsmanship. |
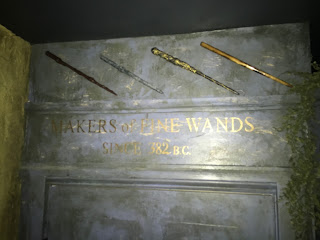 |
| I used a sticking charm to add them right above his door. |
 |
| I made another wand to stick inside of the wand box. That same day my last window piece came in so I was able to add my window pains as the last item on my checklist. |
 |
| The window panes are in! This room is COMPLETE! |
There it is. Pass through the door of the Leaky Cauldron to enter Diagon Alley. Wands are stocked and waiting to choose their wizards at Ollivanders. Fresh cut Gillyweed, Skelegrow, and Floo Powder are on display at Slug & Jiggers , The many adventure books of Gilderoy Lockheart can be found deeply discounted at Flourish & Blotts. Stay clear of Knocturn alley though....That is one scary closet! ;)
Diagon Alley is done. Thank you to all of you who have followed along with me on this journey to make one little corner of my house a magical place in another world.
With the girls room being done, I took one last look around the room, turned to walk out, and was immediately accosted by my 3 boys. "Dad! Dad! Dad! Are you going to do our room now?" There is no way out of this. I had to agree that it was their turn now. What theme to do now?
Lets just say......... it will take place.......... in a galaxy far, far away.....